User settings
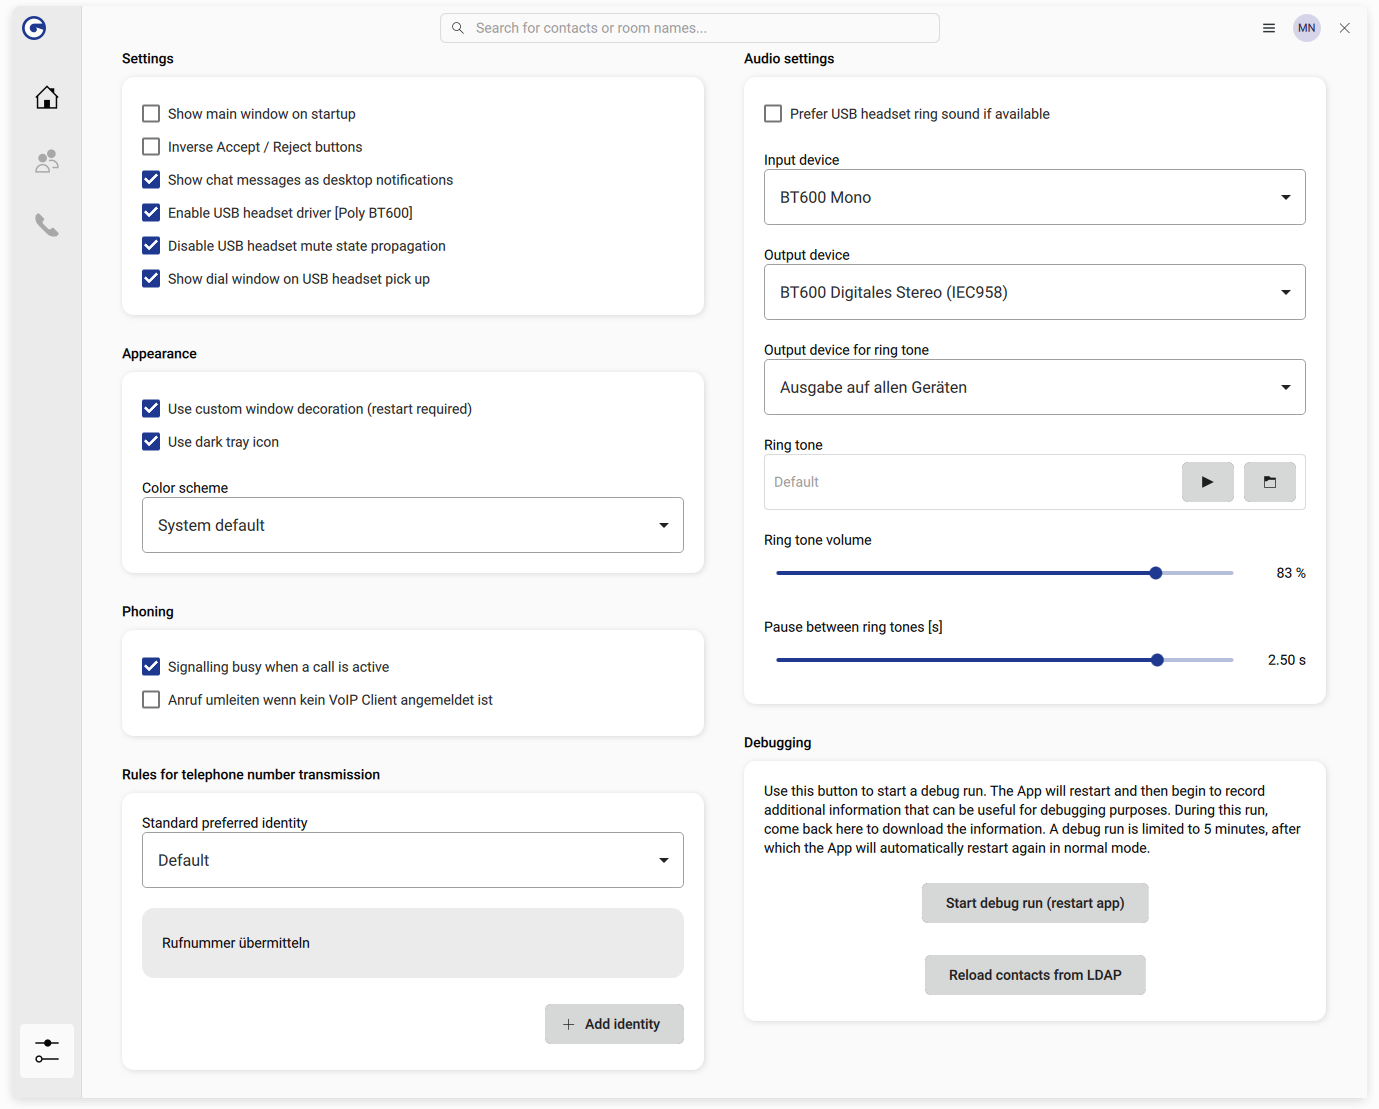
The settings screen can be accessed via the system tray icon, the app icon (for example, in the taskbar) or the bottom-left button in the main window.
The screen provides some basic settings for the end user but no technical values like the SIP registration. Those are only available via the config file.
Generic settings
- Show main window on startup
-
Defines whether the main window is shown on application start.
- Inverse Accept / Reject buttons
-
Reverses the order of the accept and reject buttons in the notification of an incoming call. Since the order is not standardized, expectations may vary among users.
- Show chat messages as desktop notifications
-
Defines whether Jitsi chat messages are also shown as desktop notifications.
- Enable USB headset driver
-
GOnnect has generic support for USB headsets. If it detects a supported device, use the checkbox enable USB headset driver to activate it.
- Disable USB headset mute state propagation
-
Enable this option if problems with the mute state occur while USB headset driver is active. Some headsets cause issues otherwise.
- Show the dial window on USB headset pick up
-
If a USB headset is detected and used, pressing Pickup brings the GOnnect window to the front.
Appearance
- Use custom window decorations (restart required)
-
Show a cleaner UI with an integrated title bar.
- Use dark tray icon
-
As GOnnect cannot detect the color of the tray, you can invert the tray icon by this option.
- Color scheme
-
The color scheme can be toggled between dark and light mode. Setting the option to "system default" will try to match the desktop setting (tested with GNOME and KDE).
Telephony settings
- Signalling busy when a call is active
-
Lets you decide what should happen on an incoming call during an already established one. If disabled, that second call will be treated as any other - displaying a desktop notification that you can reject or accept. If the check-box is enabled, that second incoming call will receive a "busy" signal and you will only be informed about a missed call. It does not matter if the already established call is a SIP/phone call or a Jitsi video conference.
Preferred identities
GOnnect allows you to change the so-called preferred identity, which describes the phone number that appears on the other side.
For example, the default identity might be to show the central number of your company when calling someone. For some specific calls, you might want to transmit your direct dial, which would be another identity. A third one could be to send a hotline phone number when calling customers of a specific company.
This part of the settings window lets you create and manage those preferred identities and define how they are selected.
The first dropdown box sets the default behavior, which defines the default selection of the dropdown box in the main window next to the search and dial input field. It provides these options:
-
Default ignores the preferred identities completely, so a called person will see whatever the phone system is set to.
-
Auto picks the identity where the called number starts with the defined prefix. To be eligible for automatic selection, the identity must be enabled and the auto flag must be true.
-
Specific identity bypasses the automatic selection and uses a single identity.
Each identity has configurable properties such as a display name, a prefix for auto selection and the number that the caller will appear as.
Audio settings
GOnnect uses the concept of audio environments. Whenever the audio device setup changes, that state is treated as its own environment. For example, you might have a different headset in the office than at home - that would be two different audio environments.
Whenever a new environment is detected, a popup window will appear and ask how to handle it. The settings available in that window are the same in this settings window, so any changes made here will always apply to the currently active environment.
This section allows you to change the input and output devices for a call, select the device on which to play the ringtone, and change the ringtone itself.
Debugging
The final part of the settings window is a button to start a debug mode. This will restart the app and increase the logging level for five minutes, during which additional information can be downloaded from the same place. Whenever you encounter a reproducible bug, please use this feature to provide detailed information in a bug report.
Although they are refreshed periodically, the reload LDAP contacts button may be used to refresh them manually.